Here is a comprehensive guide on how to adapt 2/3” B4 broadcast lenses to any mirrorless camera using corrective optics.
This adapter can be built for virtually any mounts available on the market (Sony, Nikon, Canon, Fujifilm, Lumix…) and can be made for relatively cheap compared to the off-the-shelf options available on the market.
Context
B4 lenses are designed for use with 3-CCD sensors. In order to adapt them correctly to modern single-sensors, an optical element is required to correct Spherical Aberration.
After quite a bit of research, I found that the Blackmagic B4 mount for the URSA Mini can be found at a relatively low cost compared to the other Adapter options available to us.
The idea is to combine the Blackmagic B4 mount and a lens mount (salvaged from a lens adapter) with a 3D-printed part.
 |  |
|---|---|
| URSA Mini B4 mount | Lens adapter |
See B4 Lens Nomenclature to learn about the naming system and how to choose the right B4 lens.
And see Why Adapting B4 Broadcast Lenses for a list of pro and cons of broadcast lenses.
Capabilities
- APSC coverage (with the doubler engaged)
3.8xcrop factor (FF equivalent)- No spherical aberration; the lens can be used wide open.
See Additional Information for more details.
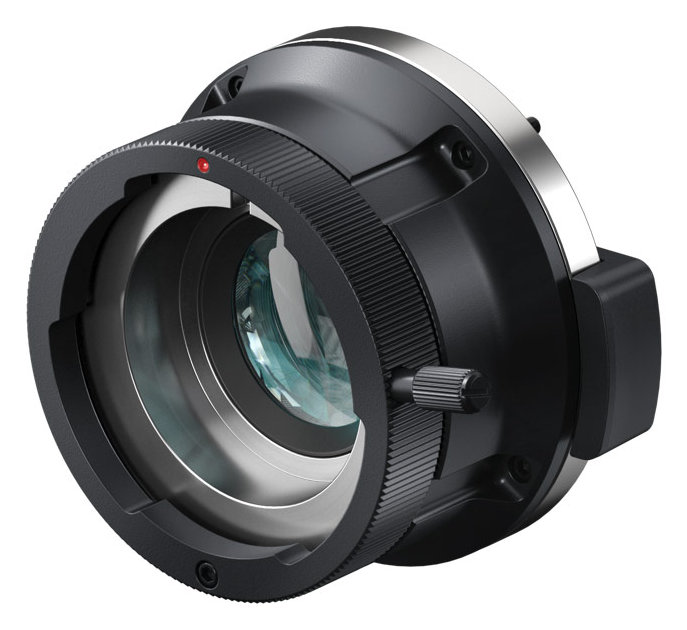
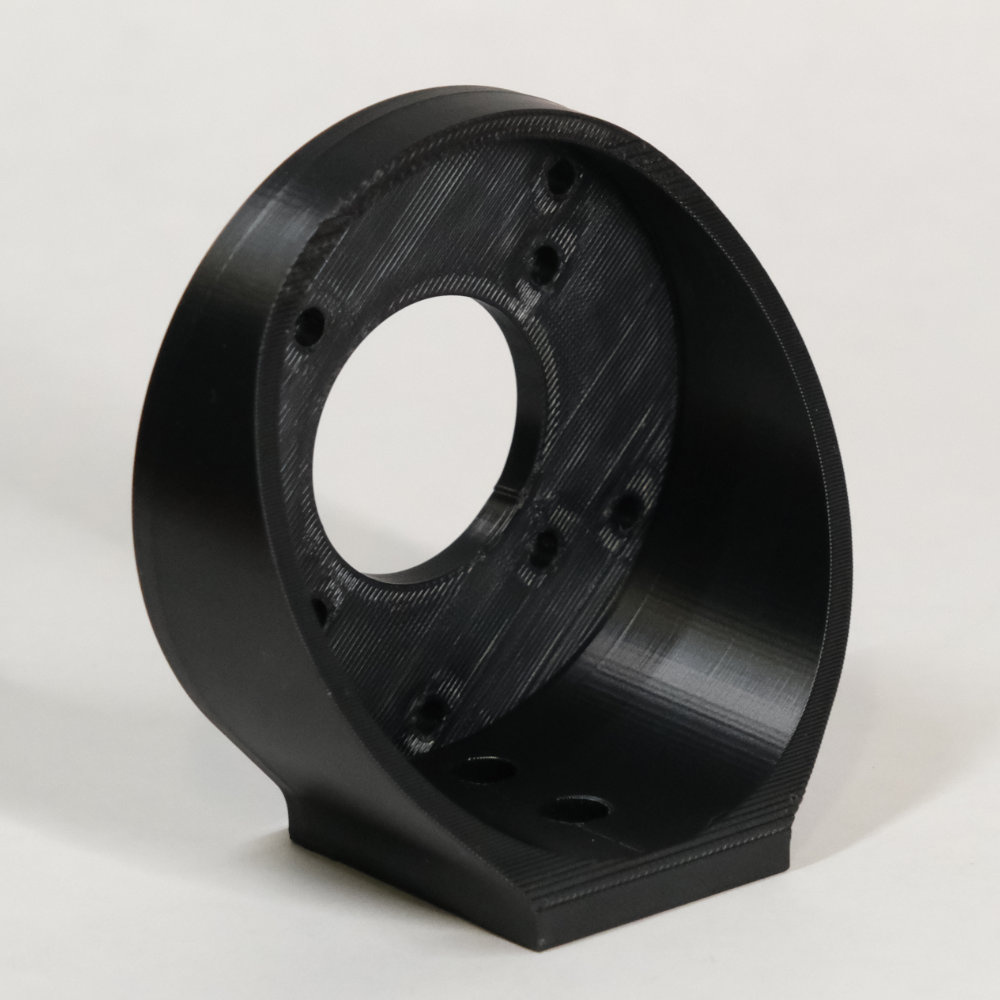
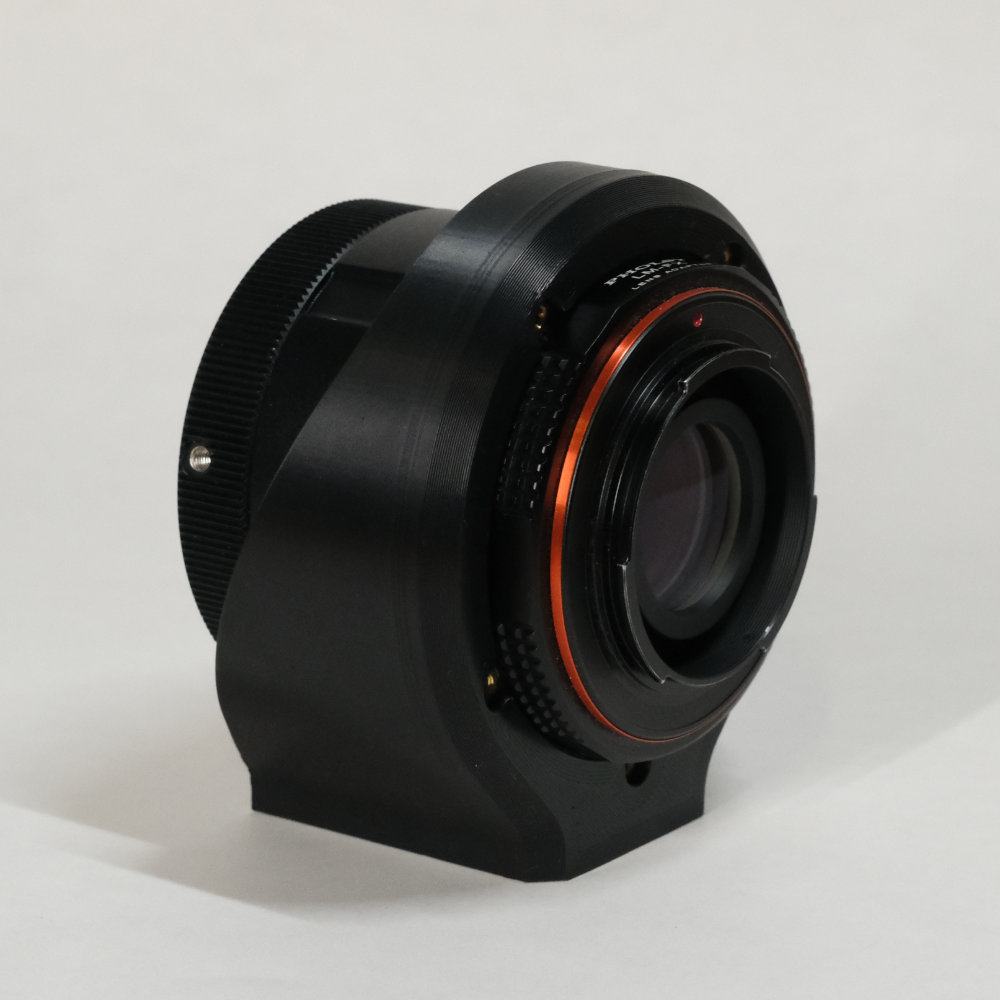
The Design
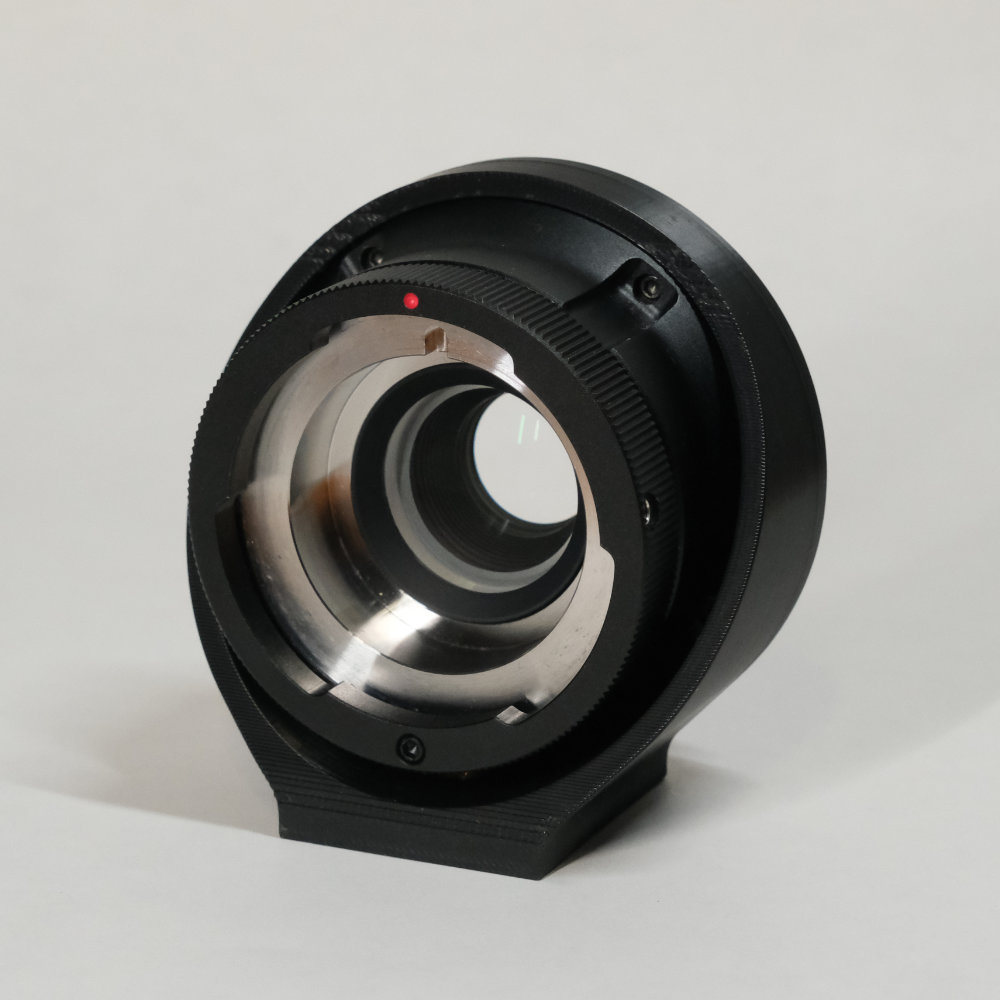 | 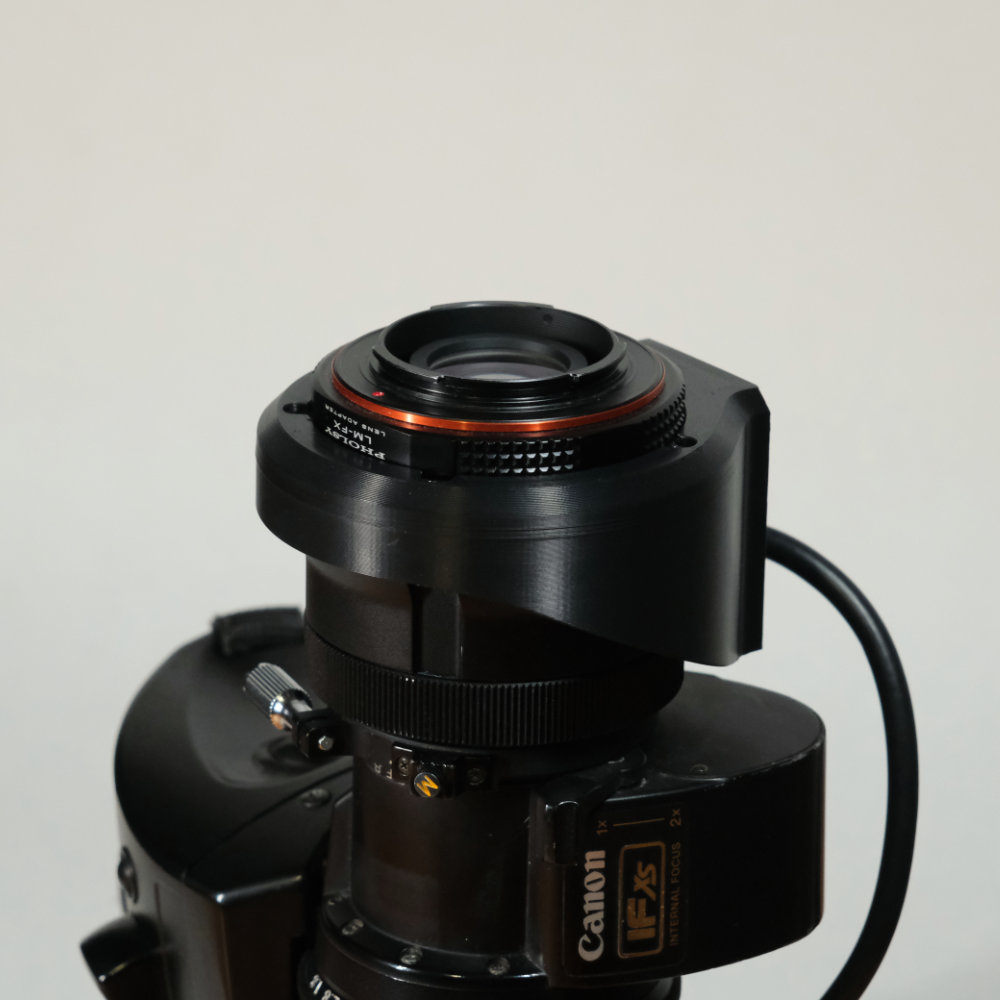 |
|---|---|
| The final adapter | Here it is mounted on a B4 lens |
CAD
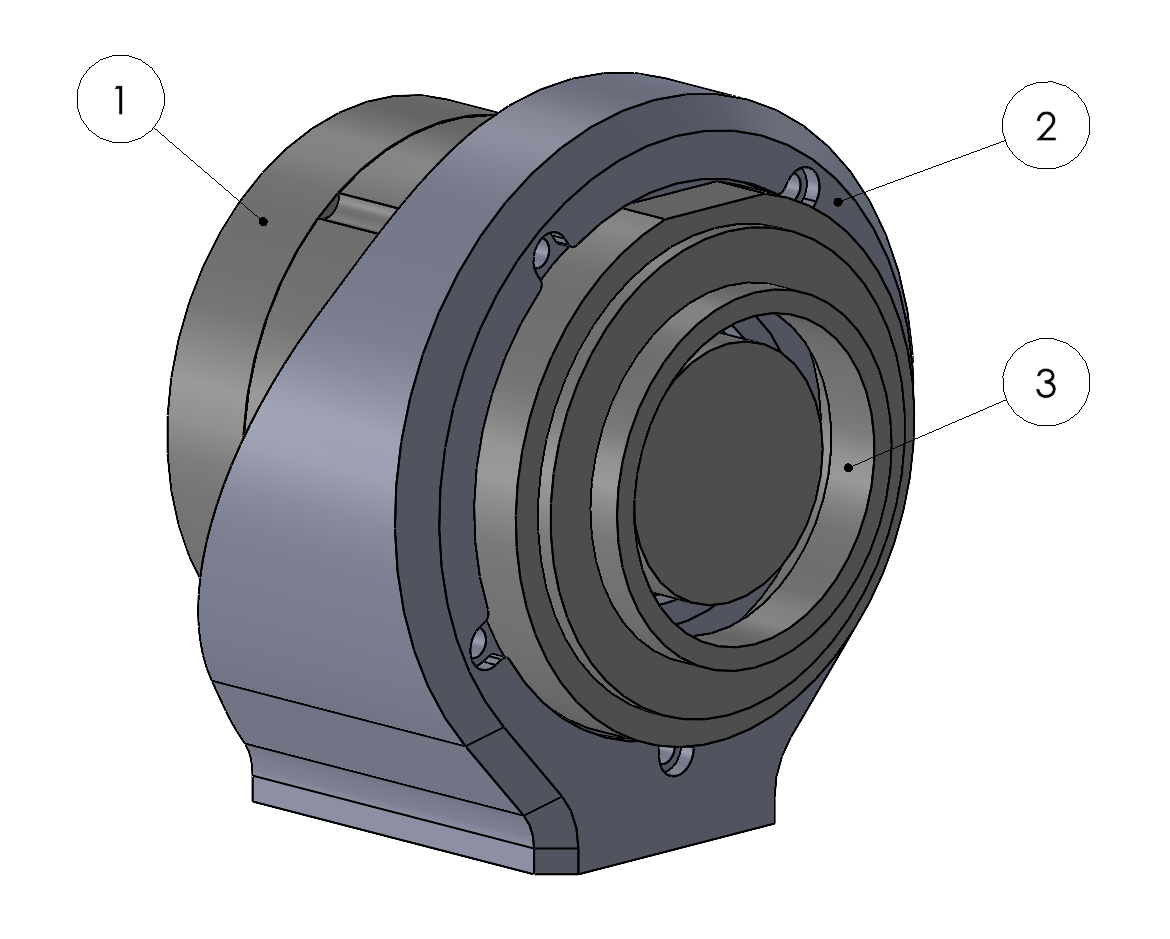 | 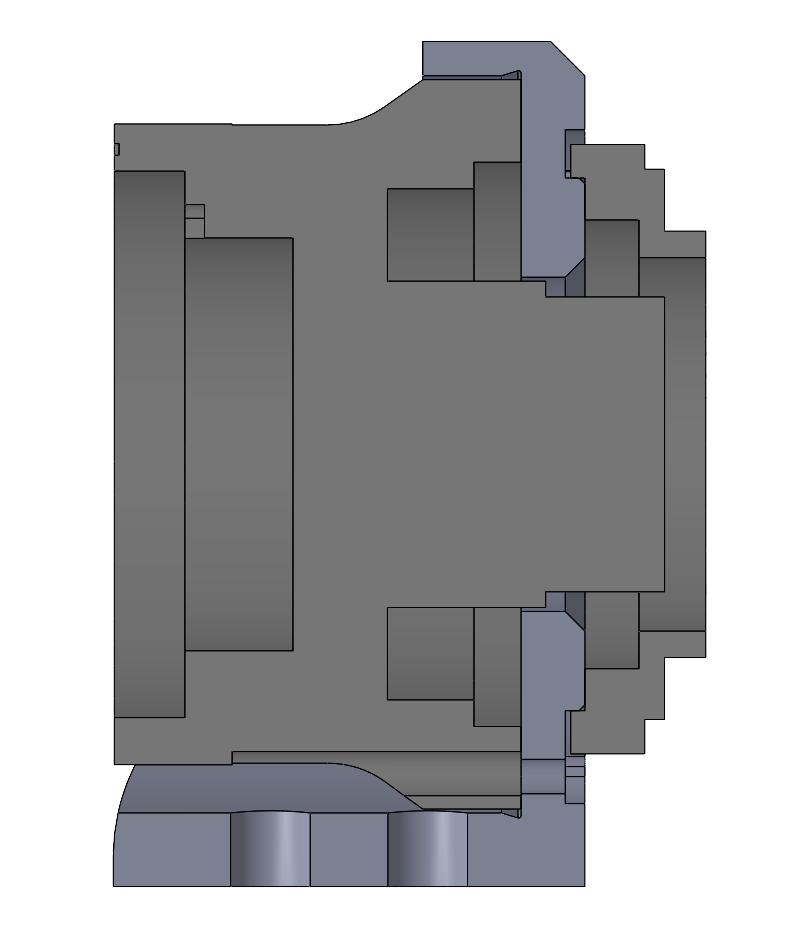 |
|---|---|
| Isometric view | Side section view |
➀ : URSA Mini B4 Mount .STEP ↓
➁ : 3D-printed part .STEP ↓
③ : Aluminium lens mount .STEP ↓
The Flange Distance of the URSA removable mount is 32.3mm. If you are interested, here is how I determined the URSA Removable Mount Flange Distance.
I designed the part around this value and the different components listed in the BOM below.
How to Build
3D Print the Part
Download the .STL ↓ , the .STEP ↓ or directly the .3MF ↓ file.
I printed the part in ASA on a Bambu Lab P1S printer.
Why ASA? Mainly for its UV and heat resistance, as well as its adequate mechanical properties.
Find all my Adapter Print Recommendations here.
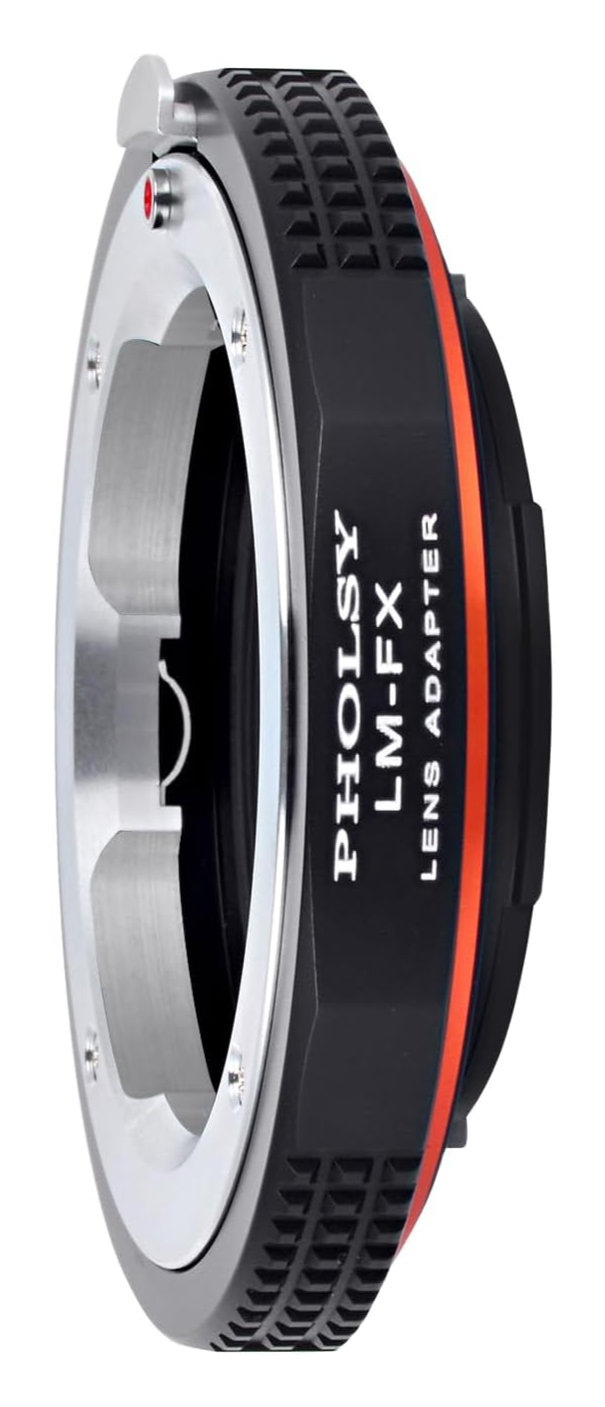
Bill of Materials
| Category | Item | Ref | Brand | Qty | Link |
|---|---|---|---|---|---|
| Mount (choose yours) | Leica M to Fuji X | LM-FX | PHOLSY | 1 | Link |
| Leica M to Sony E | LM-SE | PHOLSY | 1 | Link | |
| Leica M to L mount | LM-L | PHOLSY | 1 | Link | |
| Leica M to Nikon Z | LM-N/Z | PHOLSY | 1 | Link | |
| Leica M to MFT | LM-MFT | PHOLSY | 1 | Link | |
| Leica M to EOS-M | LM-EOS-M | PHOLSY | 1 | Link | |
| Leica M to Canon RF | LM-RF | PHOLSY | 1 | Link | |
| Corrected B4 adapter | URSA Mini B4 Mount | CINEURSAMUPROTB4HD | Blackmagic | 1 | Link |
| Screws and bolts | M1.6 x 5mm Torx Screw | ISO14580 M1.6 x 5mm | 4 | Link | |
| M1.6 Washer | DIN9021 M1.6 x 4 x 0.3 | 4 | Link | ||
| M2.5 Heat Insert | M2.5 x L4 x OD4 | 5 | Link | ||
| 1/4-20 Heat Insert | 1/4-20 x 6mm | 2 | Link |
Disclaimers:
Please note that the current design only works with the Leica M adapters listed above.
I have only tested the Fuji X version, but the design of all listed adapter is identical. So it should work with the other as well.
Tips to find the Blackmagic B4 adapter:
Buy it from the second-hand market.
Search the adapter by its reference “CINEURSAMUPROTB4HD”.
Assembly
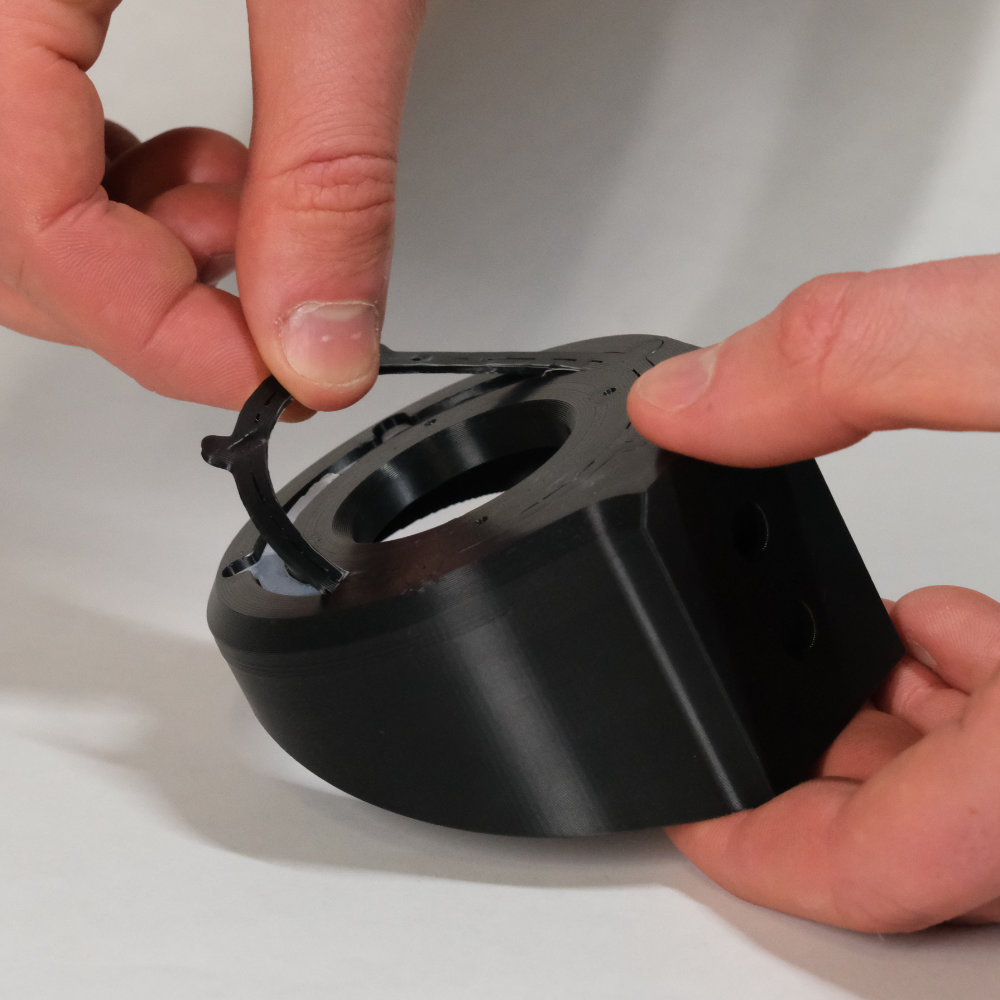
- Print the part.
- Remove the tree support. The surface is not functional but ensure no support material remains.
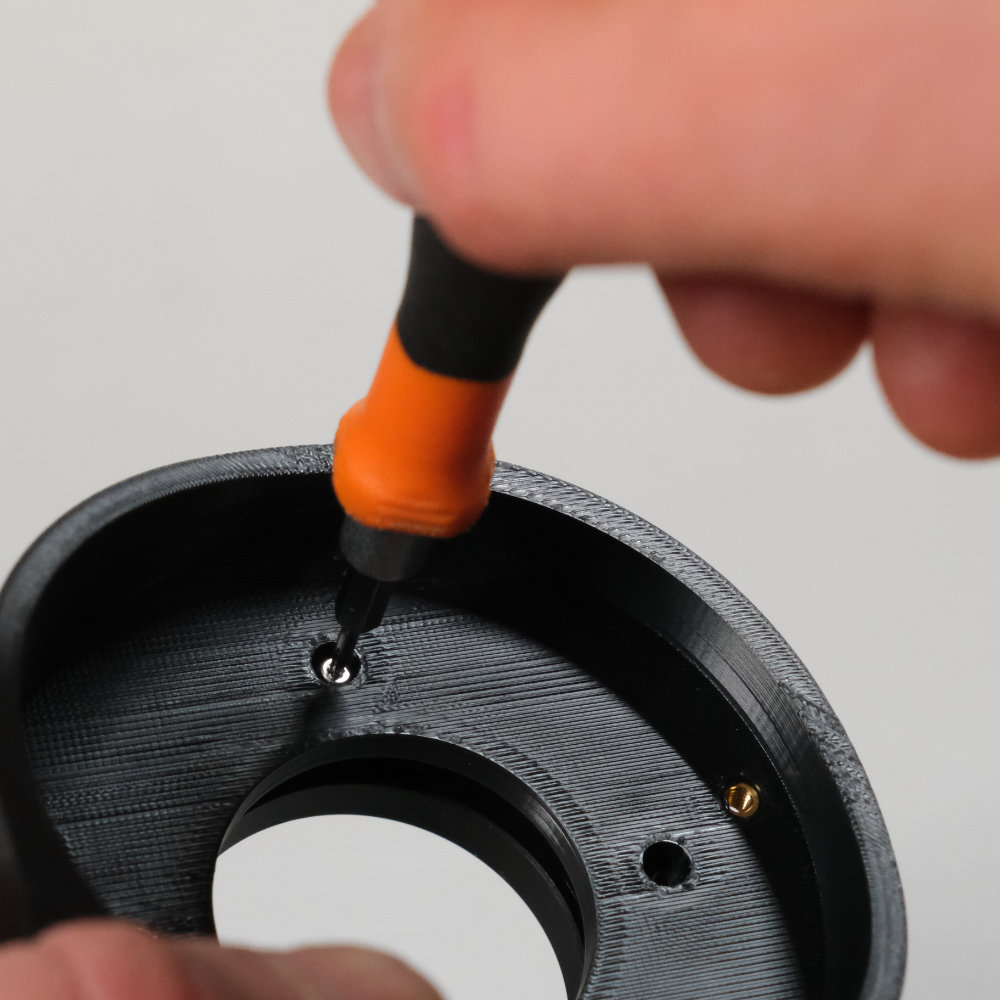
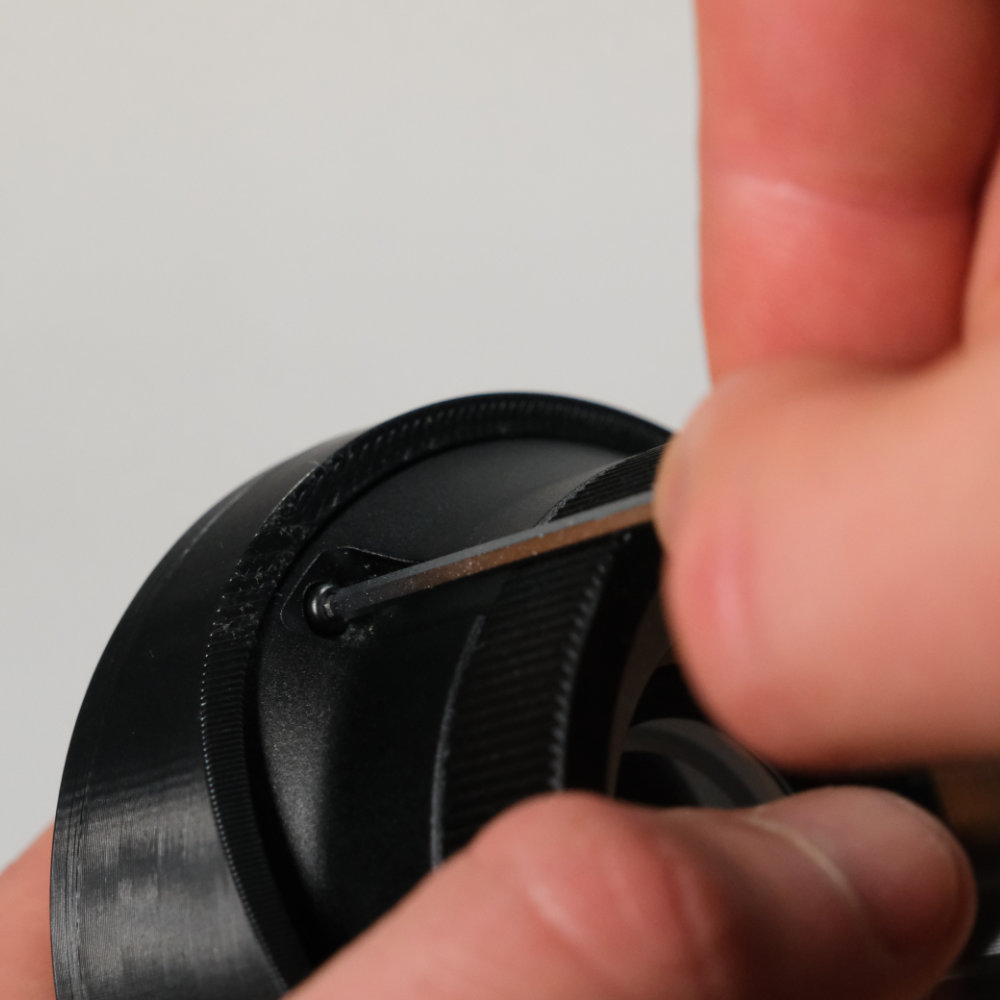
- Install the
x5M2.5 heat inserts with a soldering iron. Be meticulous, the insert must be perfectly straight.
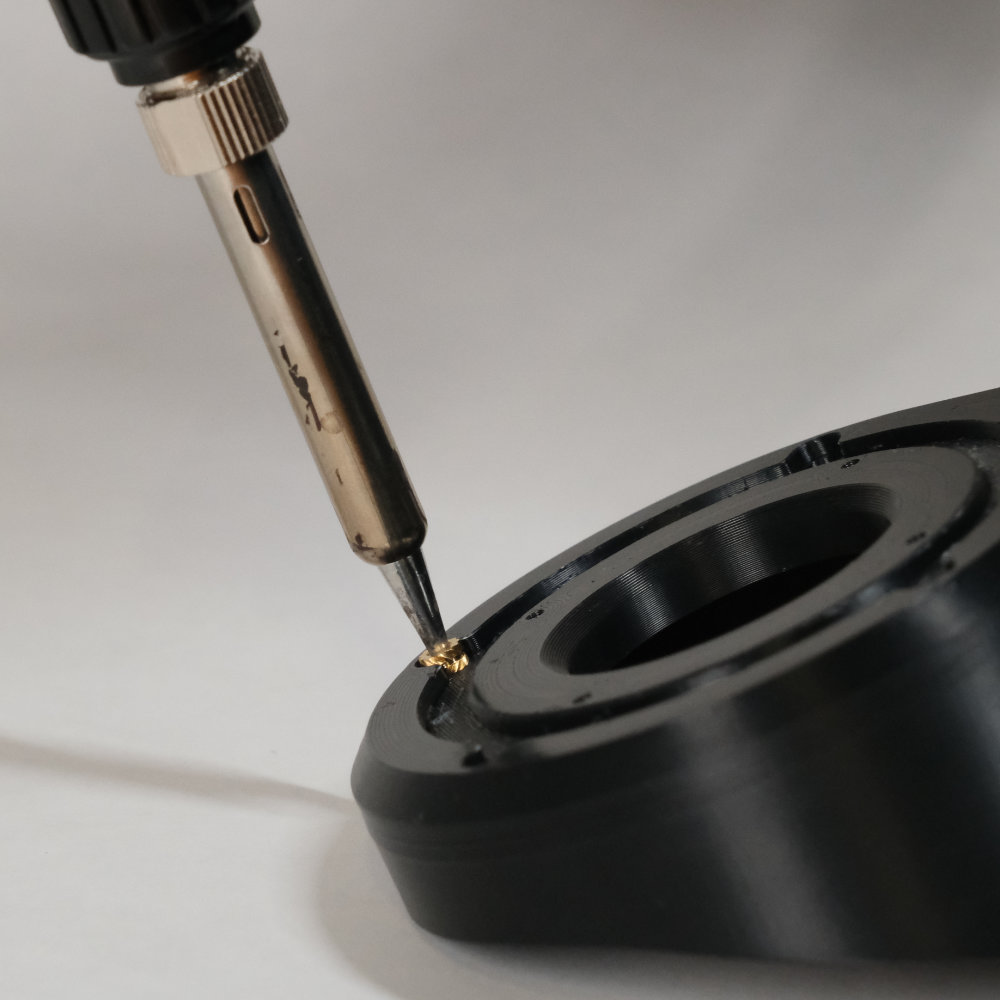
- Repeat the operation with the
x21/4-20 heat inserts.

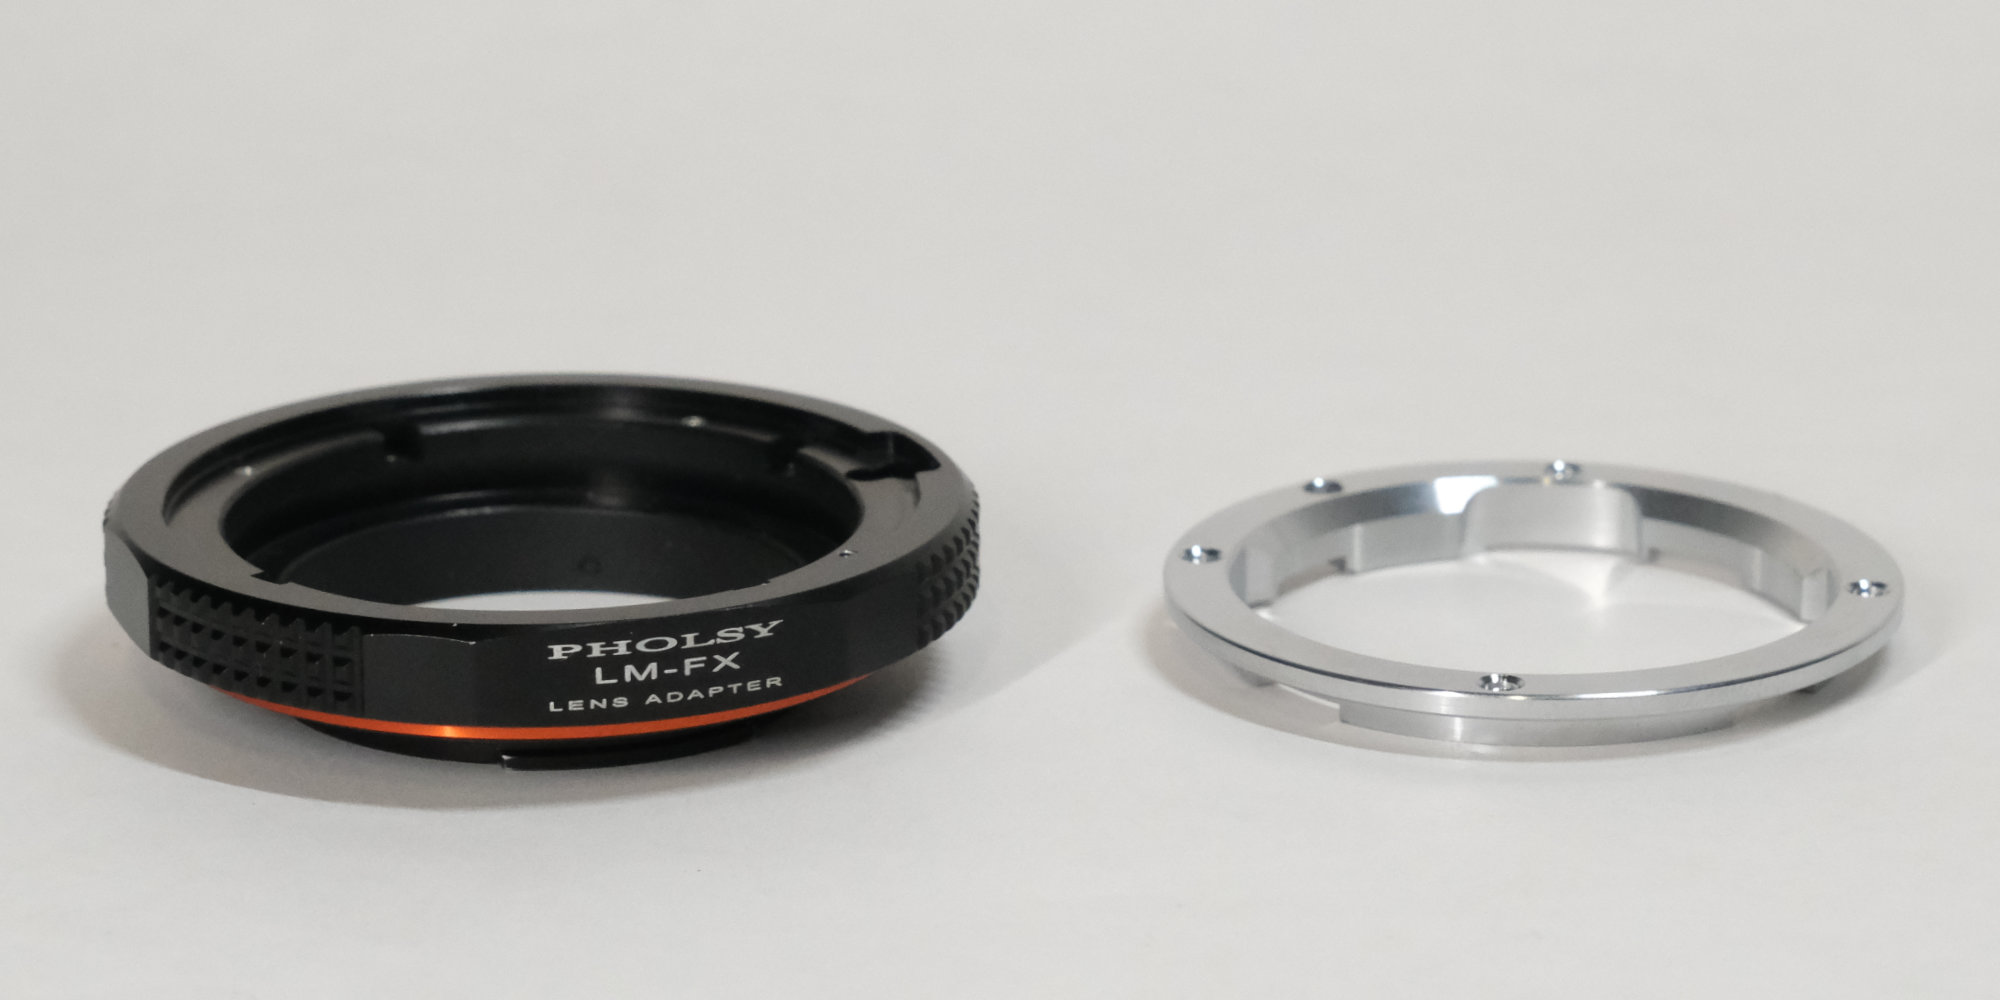
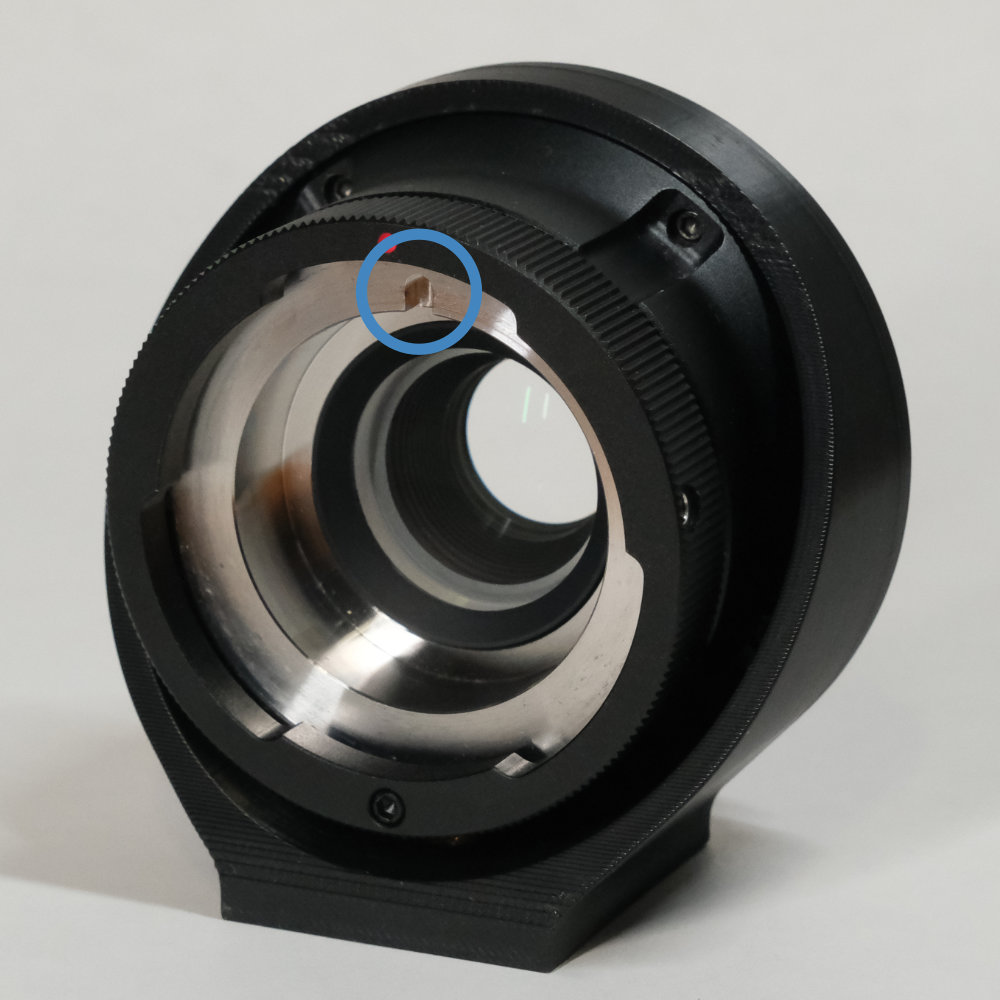
- Disassemble the Leica M adapter and keep only the black coated aluminium mount.
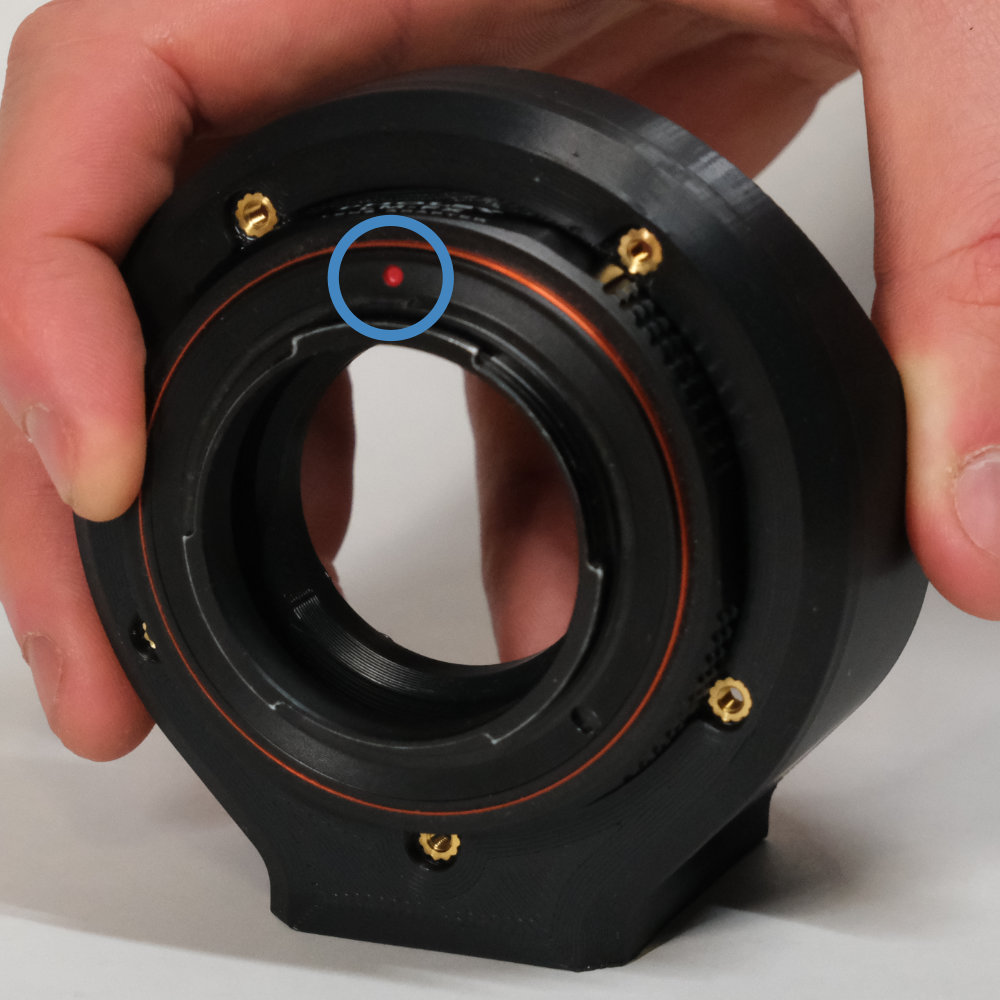
- Attach the aluminium mount to the printed part using
x4M1.6 screws and washers. Align the red dot upward.
-
Remove the plastic protrusion on the side of the URSA Mini B4 mount.
-
Attach the URSA Mini B4 mount to the printed part using the included
x5M2.5 x 12 mm screws. Align the notch upward (not necessarily the red dot).
- The adapter is now complete.
Lens / Adapter Support
The B4 mount is designed for use on heavy cameras, therefore, the connection between the lens and the adapter is extremely strong.
However, mirrorless mounts are not designed to handle this amount of weight.
You have 3 options
-
Hanging camera
If you are using a mirrorless, the mount is strong enough to hang the camera from the mount. However, be careful: do not hold the grip of the camera to move the lens around, hold the lens instead. When using a tripod, mount the adapter directly to it. -
Solid connection
Create a solid connection between the adapter and the camera body.
You can attach an Arca Swiss plate under the custom adapter. By using another Arca plate, 2 clamps and a 3D-printed riser, you can securely connect the adapter to the camera body. -
Lens support
I’ve seen people online using lens supports and rods, this is another option.
Note that there is no need for an additional “lens support” as long as the adapter is strongly connected to the camera (option 2).
I use both Option 1 & 2 depending on the shoot.
My current personal setup looks something like this :
 | 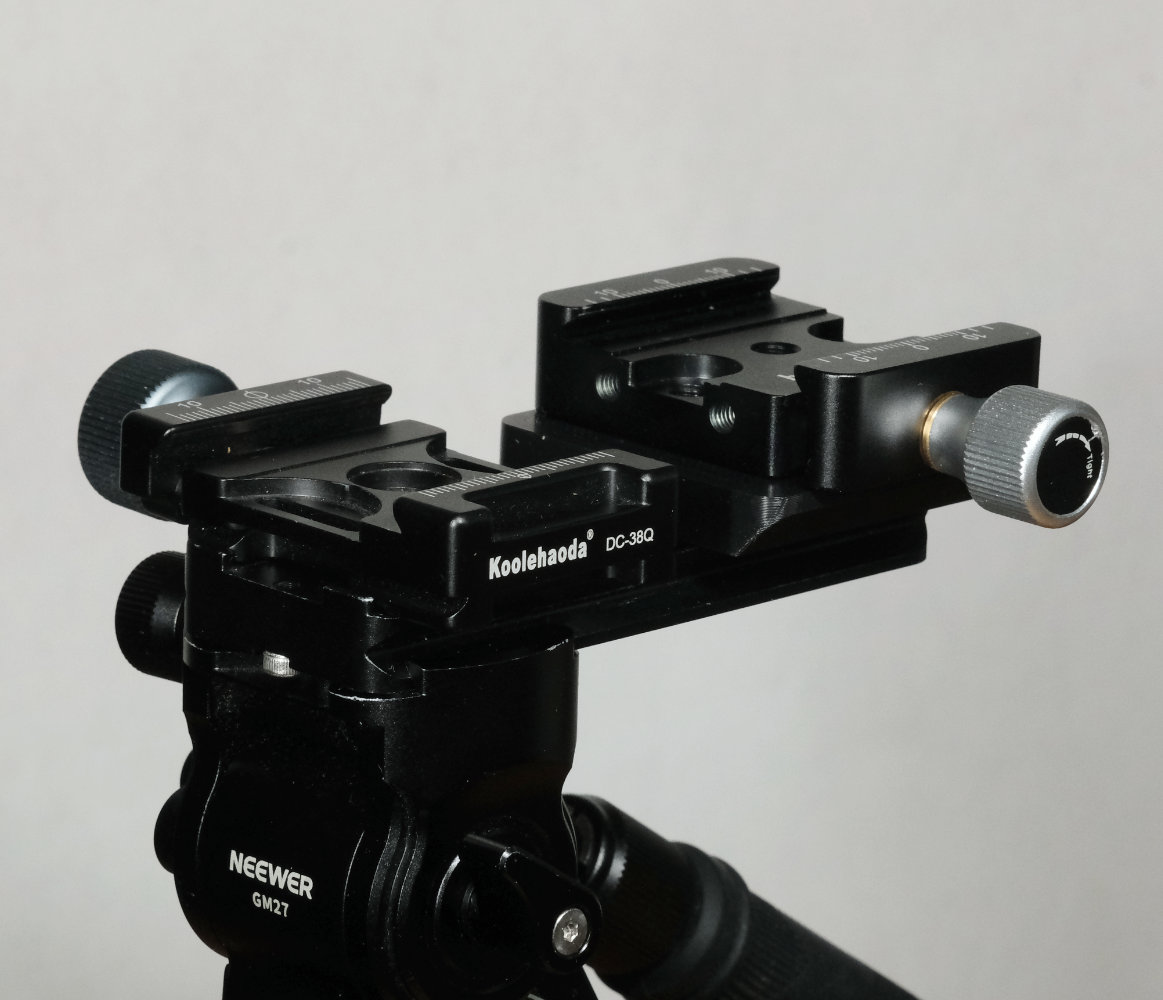 |
|---|---|
| Option 2: solid connection | Plate, clamp and riser systeme |
Powering the rocker
The rocker on the side of the lens can be used to perform smooth and slow zooms. To use it, the rocker must be powered.
Pre-made cable exist but there are quite expensive. If you know how to make your own cable, it’s worth it.
The cable attached to the lens use a male 12-pin HIROSE connector. You therefore need the female HIROSE connector and a 12 V power source. Use the pinout below to wire your cable.
Female 12-pin HIROSE pinout
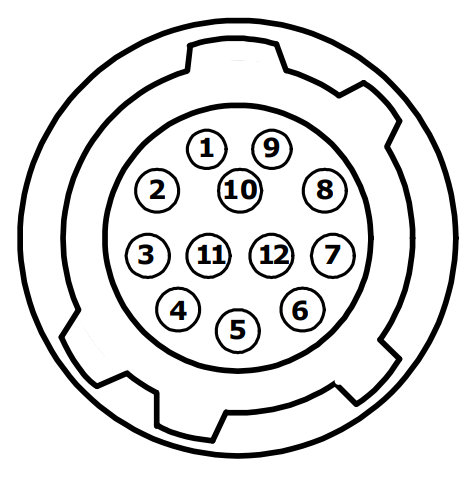
3 = GND
6 = +12 V DC
Because this information can be difficult to find, here is the detailed Lens Pinout.
I advise you to buy the female 12pin HIROSE from AliExpress. They are available in both socket and plug version (make sur to select the female connector).
For the power source, you can use an NP-F battery plate that have a 12V output, such as those from SmallRig (# 3018 or # 3168B). Alternatively you can use a D-Tap plug if you are using V-Lock batteries.
Remaining Issues
Concentricity
The tolerances of the FDM 3D-printing process do not allow for “perfect” concentricity.
This can result in the lens not zooming perfectly to the center of the frame. In practice, this issue is barely noticeable and not disturbing in most cases. Just be aware this exists.
Sample footages
If you want to see the adapter in action, check out my Canon J16ax8B4 Review.
Thanks
Thanks for reading this article, I hope you found some useful information.
I would love to discuss the topic and see if you’re building one yourself.